Chocolate Hazelnut Thumbprint Cookies
Highlighted under: Soft Kitchen
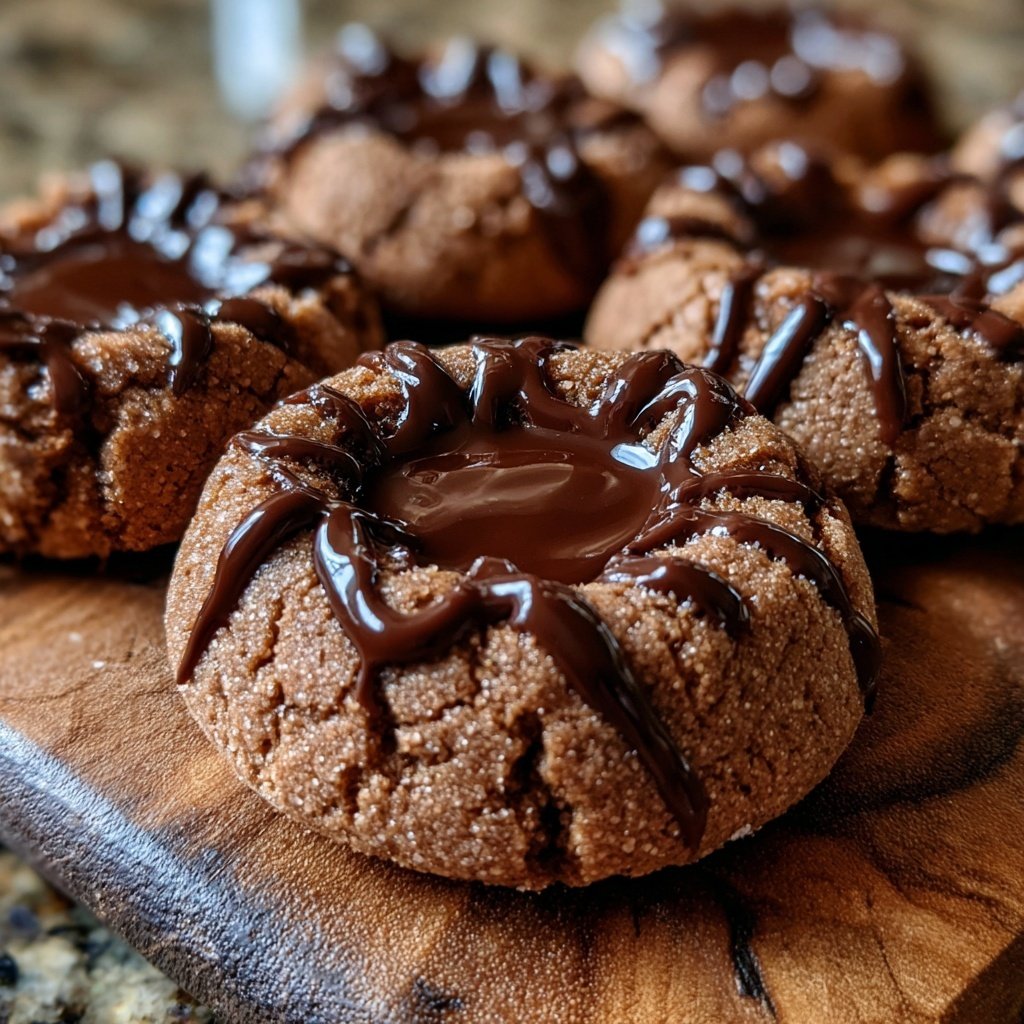
I absolutely love baking these Chocolate Hazelnut Thumbprint Cookies whenever I want to impress my friends or family. The combination of rich chocolate dough and a luscious hazelnut filling creates a flavor explosion that’s simply irresistible. Plus, the nutty aroma that fills my kitchen while they bake just makes everything feel warm and cozy. These cookies are not only delightful to taste but also have an eye-catching appearance that makes them perfect for any occasion. I can’t wait for you to try them out!
Baking these Chocolate Hazelnut Thumbprint Cookies has become a cherished tradition in my home. I remember the first time I tried them at a friend's house, the combination of textures—from the soft cookie to the creamy hazelnut filling—completely captivated me. Now, I love experimenting with different nut butters to see how they change the profile.
One crucial tip I've learned is to chill the dough before baking; this prevents spreading and helps maintain that perfect thumbprint shape. Trust me, it makes a notable difference in how beautifully they turn out!
Why You Will Love This Recipe
- Rich chocolate flavor paired with creamy hazelnut filling
- Irresistible soft and chewy texture
- Perfect for gifting or holiday celebrations
The Role of Ingredients
Each ingredient plays a crucial part in achieving the perfect texture and flavor for Chocolate Hazelnut Thumbprint Cookies. For instance, the use of unsweetened cocoa powder not only imbues the cookies with a deep chocolate flavor but also helps maintain a rich color. Unsalted butter contributes to the overall creaminess, allowing the cookies to melt in your mouth. If you're short on butter, you can use coconut oil, though it may give a slight coconut flavor. Just ensure any substitute maintains a similar fat content for the best results.
Egg yolk is key to creating the soft and chewy texture we love. It adds richness and moisture while helping the cookies hold their shape. If you're looking for an egg substitute, you might consider 1/4 cup of applesauce or a flaxseed egg (1 tablespoon ground flaxseed combined with 2.5 tablespoons of water), though these will alter the final texture slightly.
Finally, the hazelnut spread isn't just for flavor; it adds a layer of creaminess that complements the chocolate cookies perfectly. Consider trying a dark chocolate hazelnut spread for a more intense flavor. Whether you choose store-bought or homemade, make sure it's at room temperature for easy scooping into those thumbprints.
Baking Techniques
When baking these cookies, maintaining the right temperature is essential. Preheat your oven to 350°F (175°C) to ensure even baking. If your cookies seem to spread too much during baking, it might indicate that the butter was too warm when you mixed it. For more structured cookies, consider chilling the dough in the refrigerator for 30 minutes before shaping, which solidifies the butter slightly and gives the cookies a better shape as they bake.
Creating that iconic thumbprint is all about gentle pressure. Use the tip of your thumb or the back of a teaspoon to press into the dough ball, keeping in mind that the indention should be deep enough to hold the filling but not so deep that it tears the cookie apart. If your dough is too sticky to roll into balls, add a tiny bit more flour until it reaches a workable consistency. Conversely, if too dry, a splash of milk can help bring it back together.
As for baking time, keep an eye on them around the 10-minute mark. You want the edges to look set and slightly puffy while the centers may still appear a bit soft—that's perfect! They will continue to cook slightly on the baking sheet after you take them out, so avoid the temptation to bake them firm in the oven.
Ingredients
Gather these ingredients to get started on your decadent cookies:
For the Cookies
- 1 cup all-purpose flour
- 1/2 cup unsweetened cocoa powder
- 1/2 cup unsalted butter, softened
- 1/2 cup granulated sugar
- 1/4 cup powdered sugar
- 1 large egg yolk
- 1 teaspoon vanilla extract
- 1/4 teaspoon salt
For the Filling
- 1/2 cup hazelnut spread
- Chopped hazelnuts, for garnish
Once you have your ingredients ready, you're all set to dive into the delicious process of cookie making!

Instructions
Follow these steps for perfect thumbprint cookies:
Preheat the Oven
Begin by preheating your oven to 350°F (175°C) and lining a baking sheet with parchment paper.
Mix the Dough
In a bowl, cream together the softened butter, granulated sugar, and powdered sugar until light and fluffy. Add in the egg yolk and vanilla extract, mixing until combined. Gradually add in the flour, cocoa powder, and salt until a dough forms.
Shape the Cookies
Scoop out a tablespoon of dough and roll it into a ball. Place on the prepared baking sheet and use your thumb to create an indention in the center of each ball.
Fill with Hazelnut Spread
Bake the cookies in the preheated oven for about 12-15 minutes. Once you remove them, quickly fill the thumbprint with a teaspoon of hazelnut spread. Let cool.
Add the Garnish
Finish by sprinkling chopped hazelnuts around the filling for an extra crunch and visual appeal.
Let the cookies cool completely before serving or storing in an airtight container.
Pro Tips
- Chilling the cookie dough for about 30 minutes before baking will help them maintain their shape and add to the overall texture.
Storing Your Cookies
These Chocolate Hazelnut Thumbprint Cookies can be stored in an airtight container at room temperature for up to a week. Just ensure they are completely cooled before storing to avoid moisture buildup. If you’d like to keep them fresh longer, consider freezing them. Place the cookies on a baking sheet to freeze individually, then transfer them to a freezer bag, where they can last for up to three months.
When you're ready to enjoy your frozen cookies, simply take them out and let them thaw at room temperature for about 30 minutes. You can also give them a quick warm-up in a 350°F (175°C) oven for 5–7 minutes to restore their lovely texture. Just keep in mind that if you’re reheating cookies with a filling, be cautious about melting the filling too much.
If you decide to gift these delightful cookies, package them in clear bags or decorative tins lined with parchment paper, which not only protects them but adds a lovely touch to your presentation.
Variations and Customizations
Feel free to switch up the filling based on your preferences. Instead of hazelnut spread, try using almond butter or chocolate ganache for a different flavor twist. For an extra layer of flavor, consider adding spices like cinnamon or espresso powder to the dough. A teaspoon of instant coffee can enhance the chocolate notes and provide a subtle warmth.
For a festive touch, you might add a small piece of caramel or chocolate in the thumbprint before baking, creating a surprise center. Just be mindful of baking times; a gooier filling may need just a minute or two more to meld perfectly with the cookie base. If you enjoy flavor contrasts, a pinch of sea salt sprinkled atop the filled thumbprint just before serving can elevate the overall taste.
To add some texture variations, consider incorporating finely chopped nuts into the cookie dough itself or use a blend of cocoa and finely ground nuts. This can create a more complex flavor profile while staying true to the delightful nutty essence of the cookies.
Questions About Recipes
→ Can I use a different type of nut butter?
Absolutely! Almond butter or peanut butter can be great substitutes for hazelnut spread.
→ How do I store these cookies?
Store them in an airtight container at room temperature for up to a week.
→ Can I freeze the cookie dough?
Yes, you can freeze the dough for up to three months. Just thaw in the fridge before baking.
→ What can I use instead of eggs for a vegan version?
You can substitute the egg yolk with a flaxseed meal mix (1 tablespoon flaxseed meal + 2.5 tablespoons water, let it sit for 5 minutes).
Chocolate Hazelnut Thumbprint Cookies
Created by: Leonie Fairchild
Recipe Type: Soft Kitchen
Skill Level: Intermediate
Final Quantity: 24 cookies
What You'll Need
For the Cookies
- 1 cup all-purpose flour
- 1/2 cup unsweetened cocoa powder
- 1/2 cup unsalted butter, softened
- 1/2 cup granulated sugar
- 1/4 cup powdered sugar
- 1 large egg yolk
- 1 teaspoon vanilla extract
- 1/4 teaspoon salt
For the Filling
- 1/2 cup hazelnut spread
- Chopped hazelnuts, for garnish
How-To Steps
Begin by preheating your oven to 350°F (175°C) and lining a baking sheet with parchment paper.
In a bowl, cream together the softened butter, granulated sugar, and powdered sugar until light and fluffy. Add in the egg yolk and vanilla extract, mixing until combined. Gradually add in the flour, cocoa powder, and salt until a dough forms.
Scoop out a tablespoon of dough and roll it into a ball. Place on the prepared baking sheet and use your thumb to create an indention in the center of each ball.
Bake the cookies in the preheated oven for about 12-15 minutes. Once you remove them, quickly fill the thumbprint with a teaspoon of hazelnut spread. Let cool.
Finish by sprinkling chopped hazelnuts around the filling for an extra crunch and visual appeal.
Extra Tips
- Chilling the cookie dough for about 30 minutes before baking will help them maintain their shape and add to the overall texture.
Nutritional Breakdown (Per Serving)
- Calories: 170 kcal
- Total Fat: 9g
- Saturated Fat: 4g
- Cholesterol: 20mg
- Sodium: 40mg
- Total Carbohydrates: 21g
- Dietary Fiber: 1g
- Sugars: 10g
- Protein: 2g